 Home
Home Product Help
 Support
 Print
Print Feedback


Spreadsheet design notes
Creating an Excel drop down from a SharePoint List
- Open the SharePoint List created previously (see How to Create a SharePoint List from Winshuttle Query).
- Under List Tools, click List, and then click Export to Excel.

- Save the Excel Web Query file (the file has an .iqy extension) to a common SharePoint file library that is accessible to all users.
- Open the Excel file you want to add the drop down list to.
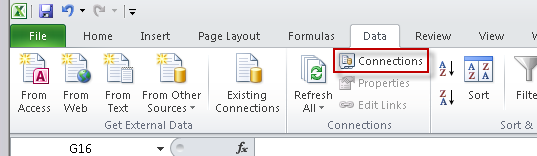
- On the Data Tab, click Connections to Import the data connection file.
- In the Workbook Connections dialog box, click Add.
- In the Existing Connections dialog box, click Browse for More, and then select the file you saved from step 3.
Add as many lists as you need for your Excel file.
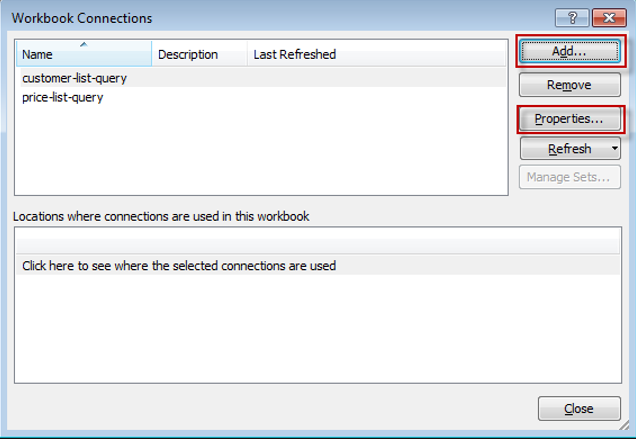
- In the Workbook Connections dialog box, select a list, and then click Properties.
- Click Refresh, and then set the data refresh to a schedule, or when the file is opened.
Return to Excel for the remainder of this process.
- In Excel, click the Data tab.
- Click Existing Connections.
- Select the data connection added in the previous section (above).
- Click Open.
- On the Import Data dialog box, do the following:

- Select Table
- Select where you want to put the data (New worksheet in this case).
- Click OK to download the data.
For the final part of this example, you will configure the drop down list in the spreadsheet so it is based upon the Excel table populated from the SharePoint List.
- Highlight the column or cells where you want the drop down to appear.
- Under the Data tab click on Data Validation button.
- In the Data Validation dialog box, on the Settings tab, do the following:
- Allow: Select List.
- Source: Set the source to the cells in the Table with the data you want for the drop down (i.e. the table in Excel where data is updated from the SharePoint list).
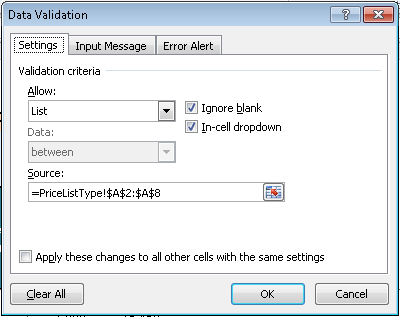
- Click OK
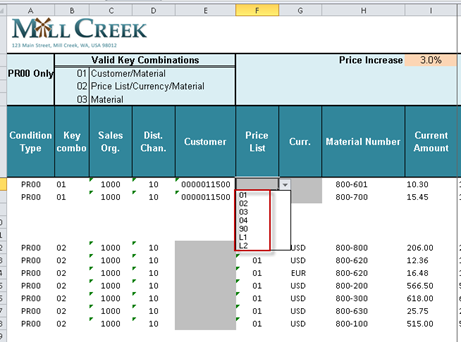
- In your Excel file, verify the dropdown options are present in the specified cells.
 Trademarks