FK03 step by step: Read SAP fields into Excel
Steps
Record
- Start Winshuttle Transaction from the desktop shortcut or from the Windows Start menu
- Click New.

- Enter transaction code FK03 in the Transaction Code box, and then click Go.
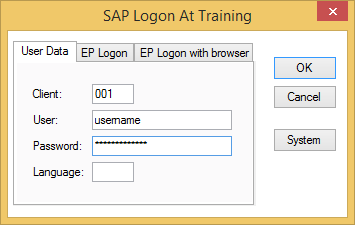
- An SAP Log On screen appears.
If you do not see the SAP system that you want, click the System button and choose a different system.

- Enter the appropriate User Data in the SAP Logon window, and then click the OK button.
- For the recording mode, click Batch Input Mode.
Note: Batch Mode will work for FK03, and Non-Batch Input Mode Without Controls will work for most transactions. Non-Batch modes are necessary for downloading information from SAP transactions, or for Finance or HR transactions in which there are Dynamic Actions executing or user parameter values being used; otherwise, if you do not have access to Non-Batch modes, you can try recording in Batch Mode. The difference between Without SAP Controls and With SAP Controls is just a matter of what tools are on the transaction screens. For more information, see the Recording modes topic (Connect mode or Central mode).
- Enter any additional properties in the appropriate fields.
- To prevent people from editing the script, check the Lock TRANSACTION script box. This will password-protect the script, preventing anyone from changing it.
<need new art>
- Click the Next button.
The FK03 transaction starts.
- Enter the vendor and the company code and click Select All.

- Click Enter.
- Click Goto > General Data > Address.

- On the same menu, click Control.

- On the same menu, click Payment transactions.

- If you get warnings, click the green checkmark button.
-
Click Goto > Company code data > Accounting info.

- Click the Exit button to end the recording.
Map
It is now time to create the mapping for this transaction. Mapping a script is just a matter of connecting SAP fields to fields in your data file. Transaction provides a Mapper to facilitate this process.
Auto Mapping will map the entire script to an Excel spreadsheet and in order. Because of the complexity of this transaction, we will choose the Create Mapping option instead.
- In the Map pane, click Create Mapping.

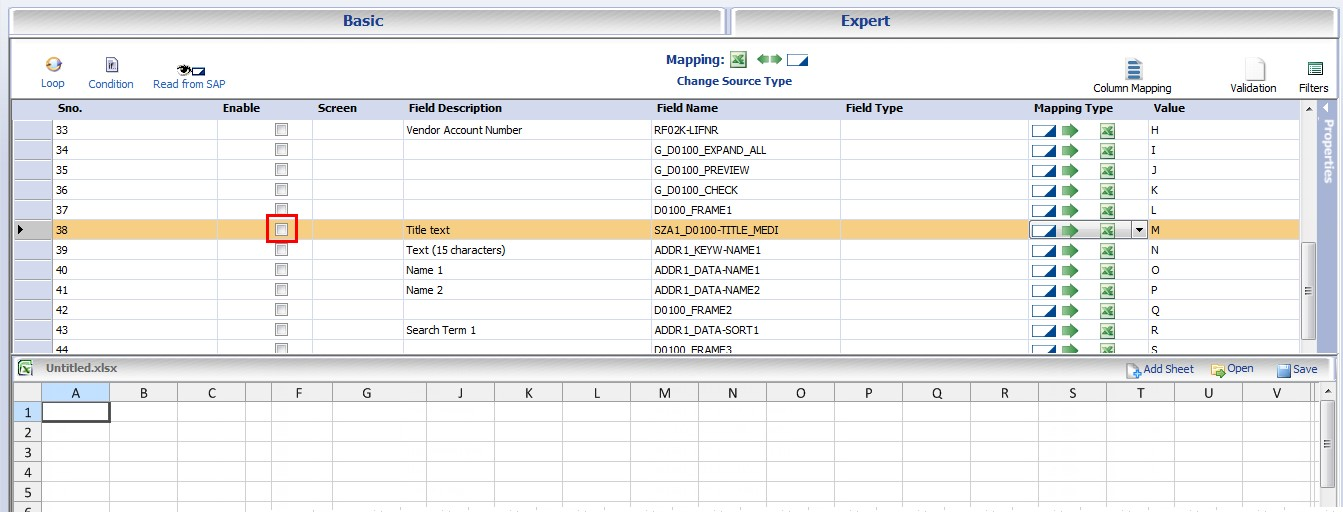
In each of the rows of the Mapper, you will see:
- Mapper Row number: This is just a reference number.
- Enable flag: only enabled Mapper rows will be executed by Transaction.
- Screen / Screen Number: Technical screen information from the recorded transaction.
- Field Description: The label associated with the SAP technical field name.
- Field Name: The SAP technical field name.
- Mapping Type: Fixed Value, Excel to SAP, SAP to Excel (or, if mapping to Access: Access to SAP, SAP to Access).
- Value: Values assigned to the SAP field; either fixed values or values to or from the assigned data source.
- Notes: Freeformat notes to provide useful information to runners of the Transaction script.
- Click Filters at the top right, and then click Hide all disabled fields to turn it off.

- Check the Enable box for all the fields that you want to read data from.

- To map the script to the data source, you will drag in the direction that the data will move. For this script, you are uploading the vendor and company code data from Excel to SAP, so you will drag from Excel to the Mapper. You are downloading the data from the other fields, so you drag from the Mapper to Excel.
Click in Column A, drag it up, and drop it onto row 2.
Click in Column B, drag it up, and drop it onto row 3.
Click in row 4, drag it down, and drop it onto Column C.
Continue across the Excel preview by dragging row 5 and dropping it onto Column D, row 6 onto Column E, and so on, until all the fields that you want have been mapped.

- The next step is to save the script file (.TxR) and the Excel preview file (.xlsx). Click the Back arrow button at the top on the File menu.
The best practice is to name the Excel spreadsheet the same name as the script unless an Excel spreadsheet will be used for multiple scripts.
- Transaction prompts you to save the Excel preview file.

- Click Yes, and then enter the Excel file name.
- Transaction prompts you to save the script.

- Click Yes, and then enter the script’s name.
Run
In the Transaction Run pane, you can specify a start and end row and change the Log column.
- To execute the downnload, click the Test button, if you are a Central user, or click the Run button if you are not a Central user.
- In the SAP Logon window, if necessary, click the System button to select the appropriate SAP system.
- Enter the appropriate user data, and then click OK.
- In the bottom left corner, Transaction displays a message when the run has finished.
More Information
Winshuttle is the ERP Usability Company, providing software products that enable business users to work with SAP directly from Excel, Web forms and other interfaces without any programming. Winshuttle focuses on a simple fact: When using SAP applications, time is money. Winshuttle’s usability solutions radically accelerate SAP user transactions, saving and redirecting millions of dollars for SAP’s customers every day. These financial benefits are achieved by significantly reducing employee and contractor costs and increasing resources to address more strategic priorities. Thousands of customers use Winshuttle to make their SAP lives easier.