 Home
Home Help Center
 Support
 Print
Print Feedback
Working with Swimlanes
To add a new swimlane or modify an existing one:

- Start Winshuttle Designer.
- In the Participants area of the Properties pane, next to Swimlanes, click […].
The Swimlane Collection Editor appears.

The Members area lists the current swimlanes in your process. You can add as many swimlanes as you need for your workflow. To assign tasks to a participant, the participant (individual or group) must be associated with the swimlane.NOTE: You must add the participants of the workflow as members of your SharePoint site and configure SharePoint site settings before you add participants.
- Do one of the following:
- To add a new swimlane, click Add. A new swimlane appears in the Members area.
- To modify an existing swimlane, click on its name in the Members area.
- In the Description property of the Participant area, click […].
The Edit Description dialog box appears.
- Type a brief description of the role that the swimlane represents in the process.
- In the Name property of the Participant area, type a name for the swimlane. For example, if the swimlane will represent a group of managers, you could type Managers.
NOTE: It is a good idea to use names that contain only alphanumeric characters and underscores. Avoid using spaces and non-alphanumeric characters.
- In the Group property, click the down arrow and select the SharePoint group that maps to the role represented by the swimlane.
The options available in the Group drop-down list depend on what you have configured in SharePoint.
NOTE: Groups are referenced from the SharePoint site associated with the current project. Groups must be defined in the SharePoint site prior to creating a workflow in order to be available in Designer as a participant in a project.
- In the Type property of the Participant area, click the down arrow and select the one of the following:
- Select Person if the swimlane represents a specific person in your workflow who will perform the role represented by the swimlane. NOTE: In most circumstances, this setting is not recommended because if the specified person is no longer involved in the workflow (in the future) you will need to modify the swimlane.
- Select PersonFromRole to enable a selection from a mapped SharePoint group. This SharePoint group of people will be presented as the list of selections to assign the swimlane.
- Select TeamFromRole to enable multiple selections from a mapped SharePoint group. This SharePoint group of people will be presented as the list of selections to assign the swimlane.
- If you selected Person in step 8, in the User property list, select a name. Use the list to avoid errors in typing in names.
NOTE: If you selected PersonFromRole or TeamFromRole in step 8, the User property is irrelevant.
- In the IncludeSelf property in the UI Support area, select True or False to indicate whether you want your name to be included in the selection list if you are a member of the associated SharePoint group.
- In the ParticipantResolver property, select a setting to specify how participants are assigned. If left blank, it will default to SelectFromRole. (See the Winshuttle Actions Reference Guide for detailed information about each Participant Resolver type and arguments).
- If you specified a type other than Select From Role in step 11, use the ParticipantResolverArguments property to configure the selected Participant Resolver.
- If you want, use the Up and Down arrow buttons to change the sequence in which the swimlanes appear in the canvas.
NOTE: Changing the swimlane order changes how the participants assigned to the swimlanes function in the workflow. Workflow activities, however, are assigned to swimlanes and do not change their location.
- Click OK.
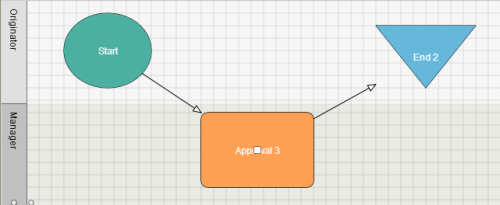
Your swimlanes appear in the Designer canvas.
Deleting Swimlanes
To remove a swimlane from a process:
- In the Participants area of the Properties window, click […] corresponding to the Swimlanes property.
The Swimlane Collection Editor appears.
- In the Members area, select the swimlane that you want to remove.
NOTE: You cannot remove the Originator or Process Owner swimlane.
- Click Remove. Click OK.
The corresponding swimlane is removed from the Designer canvas.
 Trademarks