Web Help
|
|
 Home
Home Back
Back Next
Next Contents
 Index
Index Help Center
 Support
 Print
Print|
Back to |
Process flow for Excel template form
The following are role descriptions for the participants in the process flow.
- Requestor: Interacts with SharePoint where a user uploads the Excel file document. The workflow will be automatically selected which is published in the document library.
- Manager 1: Interacts with SharePoint or email where a user can approve or reject the document.
- Manager 2: Interacts with SharePoint or email where a user can approve or reject the document.
- Accounting Team: Interacts with SharePoint where a task appears in the process list.
- Accounting Person: Downloads the Excel form from the task list in SharePoint and runs it using Winshuttle add-in. This add-in appears only in Accounting View as that team has the Runner License.
Requestor uploads the document
- On the Documents site, navigate to the Document Library where you want to upload the document.
- Click the Add Document link.
- Click Browse and locate the document you want to upload to SharePoint. Click OK.
- Enter any missing information. Click Save.
This ends the interaction between the Requestor and SharePoint. There will be a new task for Manager 1 in the task list.
Manager 1 and Manager 2 approve or reject the document
At this point, Manager 1 checks his of her task list and accepts or rejects the document in SharePoint. This can also be done by email, but server-side settings need to be configured to enable the email notification.
- If Manager 1 accepts the document within the time limit, it goes to Manager 2 for a second level of approval. Otherwise, the document gets automatically escalated to Manager 2 for approval.
- If escalated, Manager 2 follows the same procedure as Manager 1.
- If either Manager 1 or Manager 2 rejects, the document goes to the Requestor again.
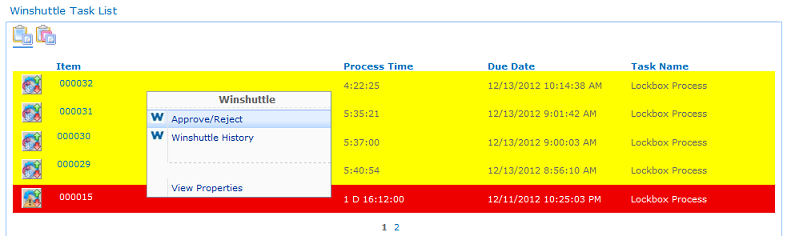
Below is the task list displaying the tasks awaiting approval or rejection. Simply locate the task you'd like to approve or reject, click the drop-down arrow for that task, and then click Approve/Reject.
Accounting Team accepts or rejects the document
The Accounting Team accepts, rejects, or cancels the document.
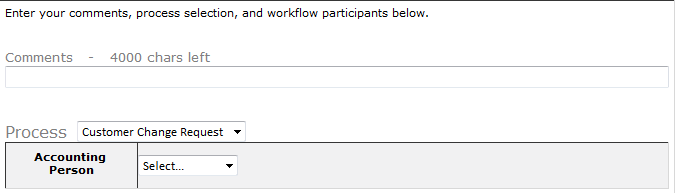
- If the Accounting Team accepts the document, it will have to select the Accounting Person who will receive the document, as shown below. The document is then assigned to that person.
- If the Accounting Team rejects or cancels the document, it then goes back to the Requestor.
Accounting Person downloads the document and uploads the data to SAP
The Accounting Person then downloads the document and uploads it to SAP using an add-in, as shown in the procedure below.
- To download the document, click the document URL on the right.

- Upload the data into SAP using the Winshuttle Add-in (Transaction or Query) in Excel.
- After uploading the data into SAP, the approver can approve or reject the data which will resend the document to the Requestor.
|
Also in this section |
|
 Trademarks
 Feedback


