Web Help
|
|
 Home
Home Back
Back Next
Next Contents
 Index
Index Help Center
 Support
 Print
Print|
Back to |
Promoting cells in Excel
To promote a field in Excel for use on a workflow, you must first define the name of a cell and then promote it.
- Right-click a cell, and then click Define Name.
- In the Name box, enter a name for the cell. Click OK. After defining the name of the cell, follow the steps below to promote the cell value to SharePoint list.
Note: Steps 3 to 5 below have to be completed twice--once for the Division field and again for the field.
- On the File menu, and then click Info.
- On the right, click Properties and then click Advanced Properties.
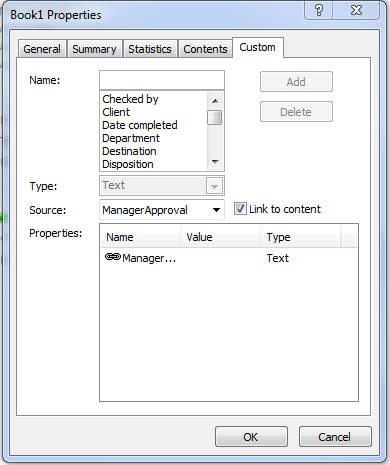
- On the Custom tab, enter a name in the Name box, and then click Add.
Note: Ensure that this name is identical to the column name you create in the SharePoint list ("Division" is the column name created in the SharePoint list).
- Select the Link to context check box. In the Source box, select the name of the cell value. Click OK.
- Save and upload your document to SharePoint.
|
Also in this section |
|
 Trademarks
 Feedback


