|
|
|
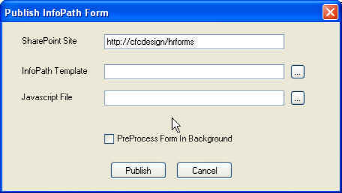
Publishing a form copies it to your Form Workflow site, allowing other SharePoint users to access it.
To publish a form
NOTE: You must have Site Administrator privileges on the SharePoint site to publish forms.
If an error message displays, you may have incorrectly typed the URL to the Form Workflow site. Try retyping and click OK.
 SharePoint list is created with the same name as the form name (.XSN file). A message box appears asking if you want to create a process for your Time Off Request Form.
The form is published to the Form Workflow site. Winshuttle Designer does the following things:
workflow. You can now use Designer to create a workflow to be associated with this form. See Using Winshuttle Designer for instructions for creating a workflow.TIP: Open a browser and go to the Form Workflow site you published the form to. In the Lists area there is a new listing for the form you published.
|
See Also Adding Winshuttle Designer Custom Controls to InfoPath Promoting InfoPath Form Fields to SharePoint Exporting InfoPath Form Fields as SharePoint Columns |