 Home
Home Contents
 Product Help
 Support
 Print
Print Feedback
Journal Entry Management options
When you click Options on the File tab, you see options for Journal Entry Management. If you have licenses for Transaction, Query or both, you will see additional Studio options.
To return all options to their original settings, click Restore Defaults.
Locations
Click Locations to change the default locations for storing script files, data files, auto logon credential (ALC) files, log and trace files, and Journal Entry Management solution files.
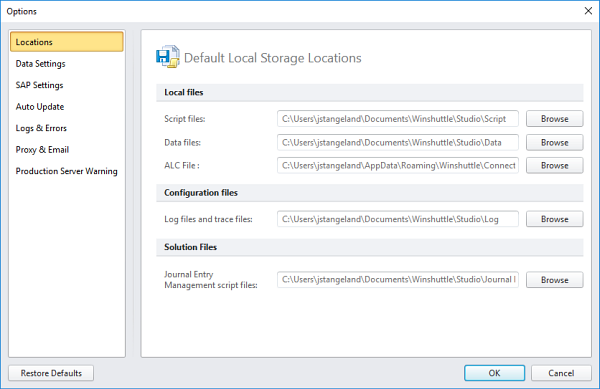
Note: The ALC File default path is C:\Users\<username>\AppData\Roaming\WinShuttle\Connector\11\LogonSettings.xml. When you change the location of the ALC files, the list of available credentials is cleared. To keep existing logons, manually copy the LogonSettings.xml, WsSAPConnector.xml, and EpLogonSettings_11.xml files to the new location.
Data Settings
Click Data Settings to change settings for the data files that use your script.
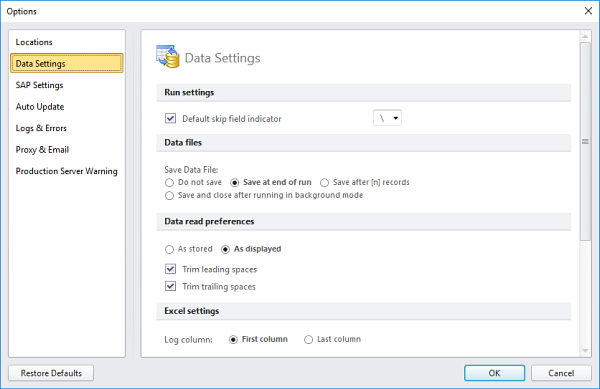
Data settings
Default skip field indicator (Transaction only): Choose a symbol from the list or type the symbol that you want to use in fields that contain no data. The indicator tells Studio not to upload the blank value from Excel and overwrite the data that is already in SAP.
Note: To remove custom symbols, click Restore Defaults, which will change all Studio options back to their original settings.
Data files
Save Data File: Choose the default instruction for saving the data file: Do not save, Save at end of run, Save after [n] records, or Save and close after running in background mode.
Data read preferences
As stored/As displayed: (Transaction only): As displayed will save only the data that appears in the data file based on the formatting of the field. As stored will upload the raw data. For long text or long strings, choose As stored.
Trim leading spaces (Transaction only): Check this box to remove spaces before the data in a field before uploading it into your SAP system.
Trim trailing spaces (Transaction only): Check this box to remove spaces after the data in a field before uploading it into your SAP system.
Excel settings

Log Column: Click First column or Last column to specify where Studio will return error messages by default.
Enable Auto Map after recording: Check this box to run Auto Map after a recording, before opening the Mapper.
Enable Excel Add-in: Check this box to ensure that the Runner add-in appears in Excel.
Important: Only Admin users can enable or disable the Excel Add-in.
Stop the run after [n] empty rows: When the script finds the specified number of consecutive empty rows, the script will stop running.
Excel headers
To avoid overwriting custom formatting, check either or both of the boxes below.
Do not write header item and line item headers: Check this box to prevent Journal Entry Management from writing headers in the Excel worksheet where the solution is published.
Do not write log item headers: Check this box to prevent Journal Entry from writing log field and log column headers.
Preserve header formatting: Check this box to retain any custom cell or column formatting when you write headers.
SAP Settings
Specify how you want SAP to work when you access data by using Winshuttle Studio.

Configuration
Logon file: Click Browse and navigate to the .ini file, and then click Open. If the location is not specific, Studio will look for a location based on the environment and default settings.
Note: If you are using SAP GUI 740, navigate to the SAPUILandscape.xml file instead of the .ini file.
SNC Library: For 64-bit systems, click Browse and locate your single sign-on configuration file. This setting is not available for 32-bit systems.
SAP logon
Stay logged on for the entire session: Check the box to stay logged on to SAP for an entire Studio session.
Default logon language: Type the code for the language that you want Studio to use when logging on to SAP. The default is EN, which stands for English.
Recording settings
Default recording mode: Select the mode to use for recording most SAP transactions. When you begin to record a transaction, the available recording mode options depend on whether the SAP system you use has Winshuttle Function Module.
Retrieve field type information: Check this box to include the field type for named fields or tables in the Mapper. For example, BDC_CURSOR and BDC_OKCODE do not have field types, so no field type is displayed.
Field types are displayed in all recording modes—Non-Batch with controls, Non-Batch without controls, and Batch mode.
Note: Runner displays field information, but Runner cannot retrieve field information.
Document Attachment Settings
(Journal Entry Management only)
Default attachment mode: Select the mode to use attaching documents:
- BDS - Business Document Service
- GOS - Generic Object Service
Note: Winshuttle Function Module is required for GOS attachment mode. For more information, contact your SAP administrator or BASIS team.
Advanced
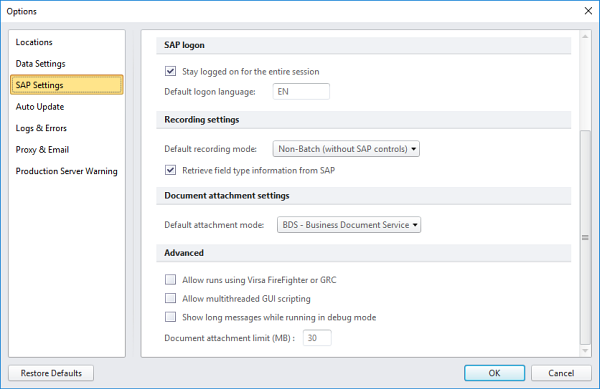
Allow runs using Virsa FireFighter or GRC: This is not supported in Journal Entry Management.
Allow multithreaded GUI scripting: This is not supported in Journal Entry Management.
Show long messages while running in debug mode: Select this check box to display descriptive messages while you run your transaction script in Debug mode.
Note: Extracting the messages requires more processing time. Clear the setting to view only the short messages, or when you are running a large number of data rows in Debug mode.
Document attachment limit (MB): Set the maximum file size for document attachments. This has been tested up to 30 MB, which is the default setting.
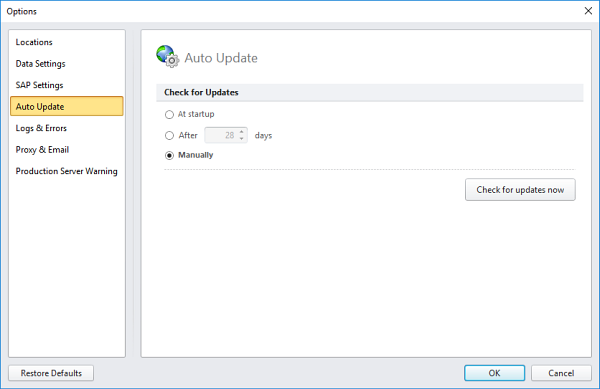
Auto Update
Specify when you want to check for updates to Winshuttle Journal Entry Management.
Logs & Errors
When you run a script, Winshuttle Studio provides information about the run. Here, you can specify how you want that information to appear.
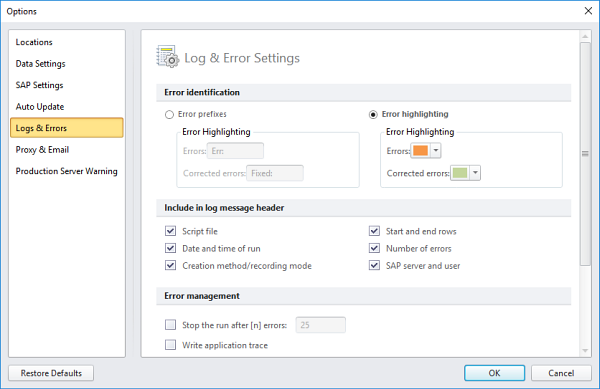
Error identification
Error prefixes: Click this option to begin each error message with the text that you enter in the Errors and Corrected errors boxes.
Error highlighting: Click this option to highlight each error with the color you choose in the Errors and Corrected errors boxes.
Include in log message header
Select each item that you want to appear in the header of the Log column.
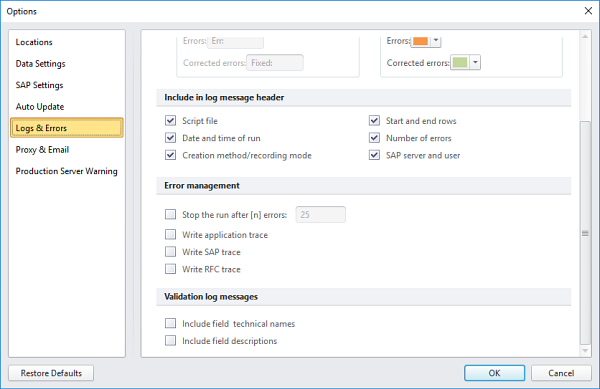
Error management
Stop the run after [n] errors: The script will stop the run when it finds the number of errors entered in this box.
The trace tools generate files that the Support team can use to help to find the root cause of problems you might experience with Studio. In the Studio Options box, you can select which trace to turn on. After you run the script, turn the trace off.
Important: You will see a warning message that the trace file will include your data. If you do not want to send your data to Winshuttle Customer Support, use test data while the trace tools are turned on.
The trace files are stored in the Log folder. The default location is C:\Users\<user name>\Documents\Winshuttle\Studio\Log.
Note: You can set the Log folder location on the Locations tab of the Studio Options box.
Validation log messages
Specify how to display information in the log messages that are returned after you click Check Data.
Include field technical names: Check this box to include the technical name, such as BKPF-BUKRS.
Include field descriptions: Check this box to include the descriptive name, such as Company Code.
Proxy & Email
Depending on your firewall and email policies, your organization may choose to route email through the internal email server, instead of through the Winshuttle default email server.
Note: Attachments can be added to email messages sent through an internal server. Attachments cannot be added to messages that are routed through the Winshuttle default email server.
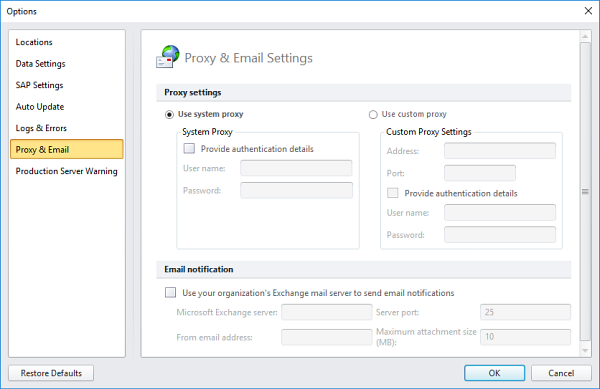
Proxy settings
If your organization uses a proxy server, contact your system administrator for the correct settings.
Email notification
Use your organization's Exchange mail server to send email notifications: Check this box to route email through an internal email server, and then enter the following information:
- Microsoft Exchange server: Type the Microsoft Exchange server name for the internal account.
- Server port: Type the port number. Your IT department can confirm the port number for your organization. The default the server port number for Studio is 25.
- From email address: Type the Exchange Server email address from which the message should be sent.
- Maximum attachment size (MB): Type the maximum attachment size, which should not exceed the size allowed on Exchange Server.
Note: Studio sends e-mail messages with attachments only when the user is logged on to the system with his or her domain authentication.
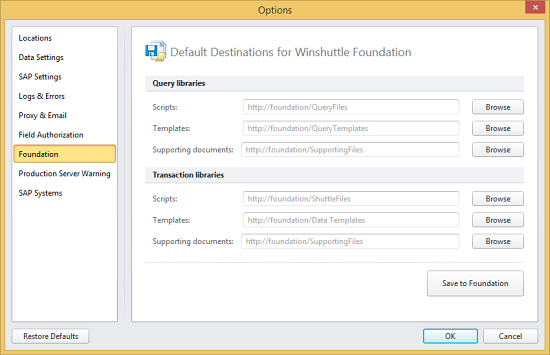
Foundation
Click Foundation to change your default server locations for storing script files, data file templates, and supporting documents.
Production Server Warning
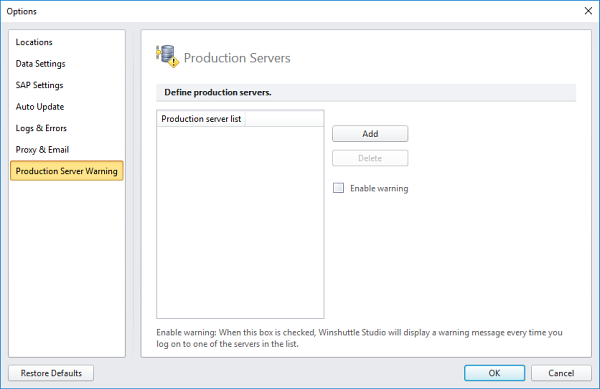
Add: Click to add a server to the Production Server List.
Delete: Click to delete the selected server from the Production Server List.
Enable warning: Click to turn on the production server warning. This will alert users whenever they start to run a script on server that is in the Production Server List.
SAP Systems
In the SAP system/credentials drop-down menu, the systems that are already defined on the Foundation site have a globe and key icon. Choose the system that you want, and then enter your credentials.
The credentials will be saved to Foundation, and you can use them for auto logon.
If you have administrator rights on Foundation, you can also use these options to define a system on Foundation. Click a system that has a key icon, or click Custom, and then enter the system details.
 Trademarks