 Home
Home Help Center
 Support
 Print
Print Feedback
In this section / On this page |
Working with Transitions
Transitions are used to define the sequence of steps in a workflow by connecting one node to another node or nodes. Each node can have an unlimited number of transitions originating from it or going to it. You can set properties for a transition that define the conditions that must be met before moving from one node to another.
To add transitions between nodes, do the following:
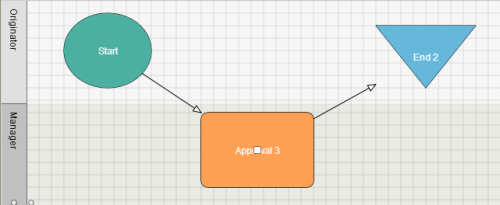
- Click in the center of a node and drag to the center of the next node to which you want to connect.
- A transition edge appears to connect the nodes. In the example below, a node called Begin Process is connected to a node called Manager Team Review. The transition edge includes an arrow, which represents the direction of the flow from one node to the next, and handles that you can drag to move the transition on the canvas.

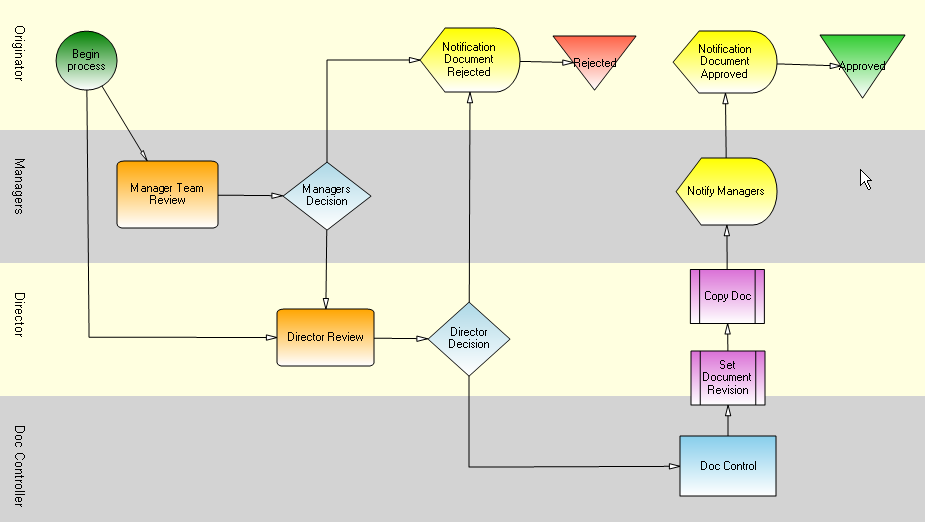
- Repeat step 1 to connect nodes as desired for your workflow.The following example shows a workflow that includes many nodes and transitions between the nodes.
- On the File menu, click Save.
Setting Transition properties
Transition properties allow you to define conditions that must be met before moving from one node to the next. For example, you can set conditions based on SharePoint column values such as Priority or Amount, or based on the current workflow state such as Approved or Rejected. Before you can use form fields on your condition, the field must first be promoted to SharePoint through InfoPath Designer Form Options section.
NOTE: See Transition Properties for more information about transition properties and shortcuts you can use when setting them.
To set transition properties
- In the Designer canvas, click on the transition for which you want to set properties.
- The Properties pane displays properties for the selected transition.
- Click in the Condition property, and then click […].
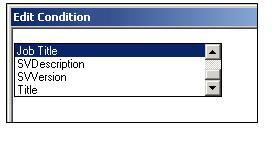
- The Edit Condition dialog box appears.
- Right-click in the Edit Condition dialog box and use the Function and Nodes pop-up menus to further specify your transition conditions.
- See Appendix D for a list of available transition functions and their descriptions.
- In the Edit Condition dialog box, type a Boolean expression to specify the conditions for the transition. You can use the following operators:
Relational Operators
Description
Logical Operators
Description
==
Equal
&&
And
!=
Not equal
||
Or
>
Greater
!
Not
>=
Greater than or equal
<
Less
<=
Less than or equal
=
Assignment
See Transition Properties for examples of frequently-used conditions and their Boolean expressions.
- Click OK.
Your workflow is updated to include the transition properties you specified.
- Repeat steps 1-5 to set additional transition properties in your workflow as needed.
- On the File menu, click Save.
Deleting Transitions
To delete a transition, do the following:
- Select (click on) the transition.
- Press Ctrl+Delete.
Transition Properties and Functions
A transition represents the movement from one node to another in a workflow. You can set transition properties, to specify the conditions that must be met before moving from one node to the next. Transition properties are specified in the Edit Condition dialog box as a Boolean expression.
This page provides detailed information about the types of conditions you can set with Transitions and includes examples of frequently used conditions.
Transition Functions
Functions enable processing of SharePoint and workflow data to branch conditionally from node to node. Arguments to functions can be literal values or specified as SharePoint column names. In the latter case, the argument values are retrieved from the given SharePoint column. The following table lists and describes transition functions.
NOTE: Some functions require a node name as an argument. To specify a node name, you can type it in the Edit Condition dialog box, or right-click in the Edit Condition dialog box and choose from the Nodes pop-up menu.
Function | Description |
Approved | Returns true if the node specified as the argument was approved by the assigned user. For example, Approved ("Manager Approval") returns true if the user assigned to the Manager Approval node chose Approve when completing the assignment. |
AutoApproved | Returns true if the specified node was approved and it was done via the Default Approval Period associated with the task. Takes the name of the node as an argument. |
Date | Takes an input value and outputs a date by adding the input value to the current date. |
ExplicitlyApproved | Returns true if the specified node was approved and it was done by the user either clicking the Approve button in the SharePoint UI or by an email approval. Takes the name of the node as an argument. |
InSiteGroup | Returns true if the person assigned to the given swimlane exists in the given SharePoint group. Takes two arguments, the first is the swimlane name, and the second is the name of the SharePoint group for consideration. Example: InSiteGroup("Approvers", "Managers") returns true if the person assigned to the Approvers swimlane is in the Managers SharePoint group. |
IsAssignmentValid | Returns true if the swimlane passed as the single argument has someone assigned to it. This function is useful if you have a process where all swimlanes might not be assigned. Example: IsAssignmentValid("Optional Approvers") will return true if anyone has been assigned to the Optional Approvers swimlane, false otherwise. |
Match | Returns true if the first argument is matched by the regular expression passed as the second argument. Example: Match("Invoice Line Items",".*Drill Bits.*") returns true if the SharePoint column Invoice Line Items contains Drill Bits anywhere in its value. |
Name | Returns the value of a Name Template. It is used to match the value of Name template and transition the workflow process to a node matching the condition. Example: ToNumber(Name("test"))>=ToNumber("03") where "test" is the name of the Name Template |
Otherwise | This is a catch-all for all other conditions. If no other emanating transition matches when the workflow engine is evaluating the next nodes to process, then any transition marked with Otherwise will be traversed. Otherwise takes no arguments. |
ProcessInfo | Takes one of Name, Description, StartDate, DueDate, CompletionDate, Status, or Originator as the argument and returns the respective process information |
Rejected | Returns true if the node specified as the argument was rejected by the assigned user. For example, Rejected("Manager Approval") returns true if the user assigned to the Manager Approval node chose Reject when completing the assignment. |
SwimlaneParticipants | Returns a comma-separated list of the users assigned to the specified Swimlane. For example, SwimlaneParticipants("Managers") returns all users assigned to the Managers swimlane. |
Task Info | Takes a task name as the first argument, and then one of Name, Description, StartDate, DueDate, CompleteDate, Status, Note, Participant, or Swimlane and returns the respective assignment information for the given task. |
ToDateTime | Converts an input string to Date Time format. Example: Date(ToNumber([test]))>ToDateTime("4/11/2014") where "test" is a column |
ToNumber | Converts text to number. Example: ToNumber(Name("test"))>=ToNumber("03") where "test" is a column |
ToString | Converts any numeric input value to a string. Example: ToString([field5])=="2" |

Example Transition Conditions
The following table shows examples for frequently-used conditions on transitions. You can modify them as needed for your workflow.
For This Condition: | Use This Boolean Expression: |
Dollar amount less than $2,500 | [Amount] < 2500 |
Manager approved and priority is urgent | Approved("Manager Approval") && [Priority] == "Urgent" |
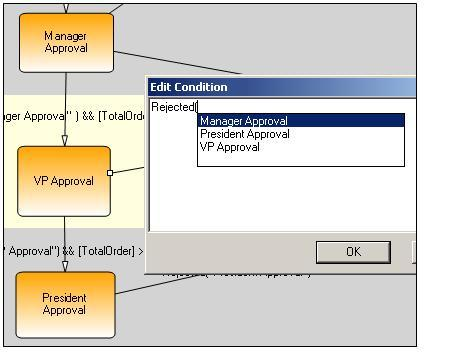
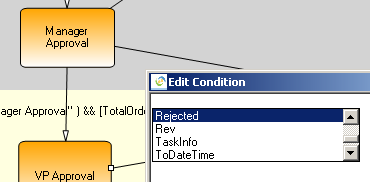
In the following example workflow, the && (and) operator is user to add a condition to the Approved function. The condition uses the value of the field TotalOrder (exported as a Form Library Column) to route the workflow to the next task. If the Manager approves and the value of the TotalOrder field is less than (<) 2500, then the workflow is directed to the Order and Receive task. If the Manager approves and the value of the TotalOrder is greater than or equal to (>=) 2500, then the workflow is directed to the VP Approval task.
Approved( "Manager Approval") && [TotalOrder] < 2500
Approved( "Manager Approval") && [TotalOrder] >= 2500

Branching a Workflow Based on Group Membership
The InSiteGroup condition on a transition allows you to branch a workflow based on the group membership of the person assigned to a swimlane.
NOTE: Your workflow must account for all participants and their group membership. Using this option will confine the branching of the process to the group listed in the branching transition. We recommended that you use the Otherwise condition to account for new groups in the future.
To use the InSiteGroup condition:
- Select the transition going to the task you want to branch based on group membership.
- Set its condition to:
InSiteGroup ("<swimlane name>","<SharePoint group>")
The <swimlane name> entry references the user assigned to the swimlane. The <SharePoint group> entry references the group membership.
TIP: Configure another transition with the Otherwise condition to account for new groups in the future.
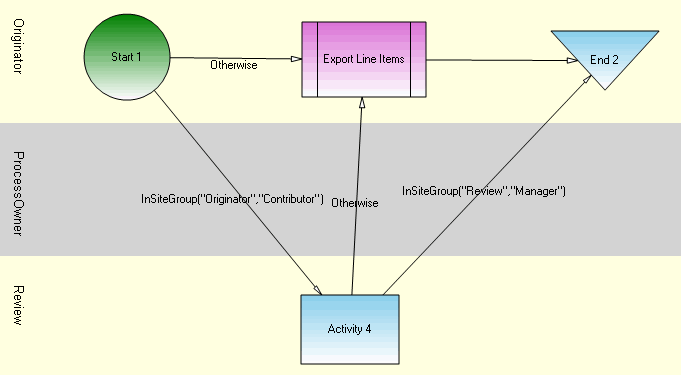
In the example above, the workflow branches to Activity 4 in the Review swimlane if the user in the Originator swimlane (the Originator of the process) is a member of the Contributor group. All other Originators of the process are branched to the Export Line Items plug-in.
Once Activity 4 in the Review swimlane is completed, the workflow branches to End 2 in the Originator swimlane if the participant in the Review swimlane (the person who completed Activity 4) is a member of the Manager group. All other participants are branched to the Export Line Items plug-in.
Using the IsAssignmentValid condition
The IsAssignmentValid condition on a transition allows you to check if a person was assigned to the swimlane. This enables you to create workflows that contain tasks that are unassigned if the form does not always require them. This condition works in conjunction with the Designer.WorkflowParticipant custom control and its Allow None option.
NOTE: The Designer.WorkflowParticipant custom control allows you to configure your form to selectively display the Participant Assignment menu when a form is started and as it makes its way through the workflow. Multiple Designer .WorkflowParticipant controls can be added to a form’s view, depending on the number of Participant Assignment menus you want to display at a given step in the workflow.
To use the IsAssignmentValid condition:
- In your InfoPath form, configure the Designer.WorkflowParticipant custom control with the Allow None option.
- Select the transition going to the task you want to make optional and set its condition to IsAssignmentValid("<swim lane name>").
Note: Make sure your workflow accounts for the possibility of some tasks not being assigned.
Tips & Tricks: Shortcuts for using Transition Properties
The following sections describe shortcuts that you can use when setting transition properties.
CTRL + , (comma) in a Condition Window
Pressing the CTRL and , (comma) keys simultaneously in a value or condition window displays the Approval Nodes menu. This menu lists the approval nodes used in your workflow and is used in conjunction with the Function menu (CTRL + ; (semicolon)) to build conditions.
CTRL + . (period) in a Value or Condition Window
Pressing the CTRL and . (period) keys simultaneously in a value or condition window displays the SharePoint List Columns menu. This menu contains the column.
CTRL + ; (Semicolon) in a Condition Window
Pressing the CTRL and ; (semicolon) keys simultaneously in a value or condition window displays the Function menu. This menu contains functions that can be used to build conditions.
Right-click on Transitions
Right-clicking on transitions that originate from Approval nodes displays a menu with dispositions for the node.

 Trademarks