 Home
Home Help Center
 Support
 Print
Print Feedback
Advanced form library functions
The following sections describe some advanced Form Workflow functions.
On this page
- Removing a form definition from the form library
- Changing the form order in the Winshuttle form library
- Creating a URL for opening a form
Removing a Form Definition from the Form Library
You can remove a form definition, so that it does not appear in the drop-down list in the Winshuttle Form Library. When you remove a form definition, no further instances of that form can be run. Any existing instances of the form will continue to run until completion.
CAUTION: Do not delete the .XSN file from the document library of the form.
To remove a form definition from the Form Library:
- Navigate to the forms document library in the site.
- Add a SharePoint column to this document library named SVActive with a type of Yes/No (Checkbox).
- For each form type that you want to remove from the Winshuttle Form Library, set the column value for that form to No by de-selecting the check box.
Changing the Form Order in the Winshuttle Form Library
You can change the order in which the forms appear in the Winshuttle drop-down list in the Winshuttle Form Library.
To change the form order:
- Navigate to the forms document library in the site.
- Add a SharePoint column to this document library named SVSortOrder with a type of Number.
- For each form type, enter the ordinal for that form type in its SVSortOrder column 'formtypes'.
Creating a URL for Starting a Form
You can create URLs that directly start a form. The link accesses the form without selecting it from the forms drop-down list in the Winshuttle Form Library.
Use the form URL structure below to build direct links to Designer:
http://<domain>/<SharePoint Site>/_layouts/new_form.sharevis.aspx?type=<form name>
Important Note for SharePoint 2007 users
For each of the HTTP:// examples shown below, you will need to modify the path and add /1033/ (after /_layouts) in the path. See example below:
http://<domain>/<SharePoint Site>/_layouts/1033/new_form.sharevis.aspx?type=<form name>
To create a URL to a form:
- Go to the SharePoint site that contains the form you want to create a URL for.
- Copy the domain and SharePoint site information into the form URL structure.

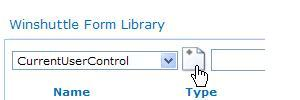
http://sample.domain.local/SSO%20Check/_layouts/new_form.sharevis.aspx?type=Form - From the Designer menu in the Winshuttle Form Library, select the form you want to create a URL for.
- Enter the form name into the form URL structure.
http://acme/hr/_layouts/new_form.sharevis.aspx?type=<form name>TIP: Use the "%20" sign between the spaces in the words that make up the name of your form.
Your URL should look similar to this:
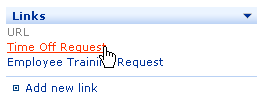
http://sample.domain.local/SSO%20Check/_layouts/new_form.sharevis.aspx?type=Form - To test the URL: Type the URL into a browser address bar, and then press Enter/click Go.
The link should access your form.

NOTE: You may be required to enter your credentials if you are not logged in.
Note about SharePoint Permissions
The default settings for a Form Workflow list are for End Users to have access only to the items they create. The exception is a user who has Manage Lists rights. This user has access to all items in the list, regardless of who created them. See your SharePoint documentation for more information about setting permissions in SharePoint.
 Trademarks