Applies to:
Importing from Designer
When you move to Winshuttle Composer from Winshuttle Designer, you can directly import several parts of the solutions you built with Designer:
- The basic workflow
- The Transaction and Query scripts
Note that Composer currently does not support directly importing forms created in Microsoft InfoPath.
See below for ways of importing the workflow/scripts from Winshuttle Designer solutions.
Option 1: Create a new solution from the scripts, and then import the workflow
Back to top- Start a new solution in Winshuttle Composer. From the Start menu, click New Solution.
See Working with Solutions for more information about opening and creating Winshuttle Composer solutions.
Once your basic solution is created, you can import your Designer Workflow.

- From the Composer Menu bar, click the Start button, click Import, and then click File.

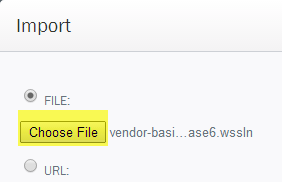
- On the Import screen, click Choose File, and then browse to the Designer (.wssln) or .svp file with your workflow. (OR: Enter the URL to the file, and the Domain, Username, and Password credentials required to access it.)
- At the bottom of the Import screen (see example below), you should see a list of the items Composer can import. Select the checkbox for the workflow, and then click Next.
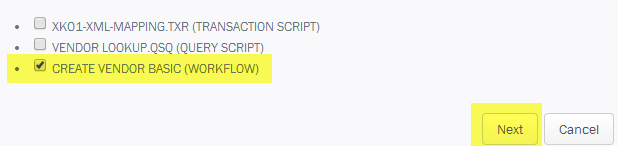
(Note that in this example, we are only importing the Workflow.)
The basic Designer workflow is now imported into Winshuttle Composer.
Option 2: Import a Designer Solution
Note that while you can import a Designer Solution, which includes the workflow and any scripts that are part of the solution, you cannot directly import a Microsoft InfoPath form. You will need to recreate your form in Winshuttle Composer.
Importing from Winshuttle Designer into Composer
Back to top- From the Composer Menu bar, click the Start button, and then click Import.
- Select File, click Choose File, and then browse to the .wssln file or your .svp workflow file.
- At the bottom of the Import screen, you should see a list of the items Composer can import.
In the example below, Composer will import a Winshuttle Query script, a Winshuttle Transaction script, and the basic Workflow.
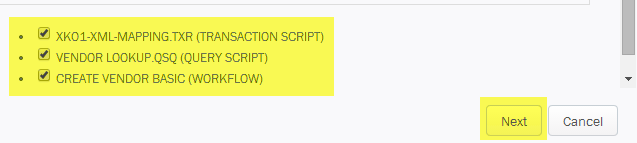
- Select the items you want to import, and then click Next.
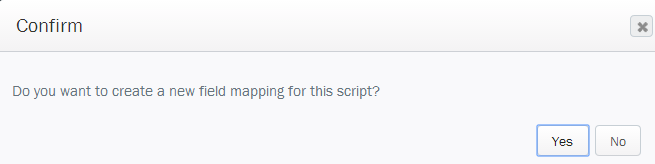
- If you are importing scripts, you will be prompted to create a new Field Mapping. Click Yes. (You may be prompted more than once if you are importing multiple scripts.)
- On the Field Mapping screen, do the following:
- Description: Type a description for the field mapping.
- Group Name: Type the group name under which the field mapping will appear in the Solution Pane. (Note: No spaces are allowed in this name--use underscore characters instead).
- Generate Repeating Section: Select this if you wish to create a repeating section from the imported script.
- Mapping Name: Type a descriptive name that will be used for mapping the fields in the Solution Pane.
- Connection: Select Use the Logged in Windows Account, or Use Specified Account. If using a specified account, provide the Domain, User Name, and Password.
Click Generate.
- The Field Mapping Parameters screen appears:
- Select Use Existing Fields or Use SAP Credentials (whichever is appropriate to your solution).
- Input Values: Delete input fields or remap them as necessary.
- Output Values: Delete input fields or remap them as necessary
- Click Generate Form Fields.
- Click OK.
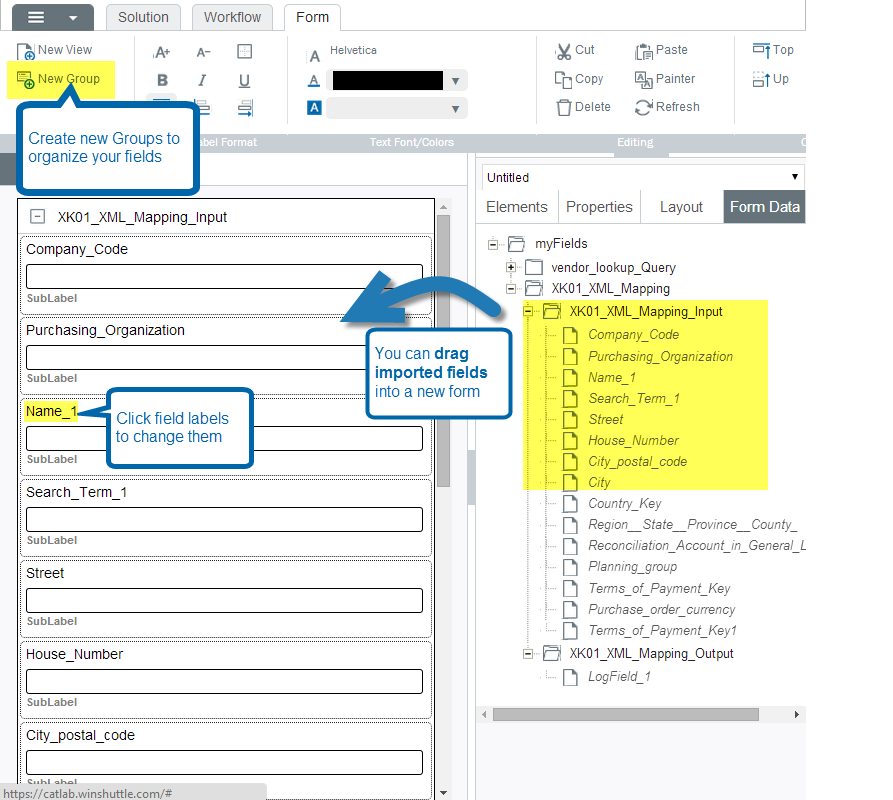
Once the basic elements of your solution are imported, you can begin creating a new form in Composer.
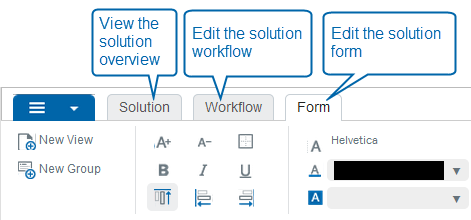
To get started creating a new form from your newly imported Designer Solution, click the Form tab.