Applies to:
Winshuttle Server 10.x Admin Tool Guide: Migrating databases
Back to
Related Topics
On this page
The Winshuttle Server Data Migration Utility migrates data from an earlier version of Winshuttle Server to a Winshuttle Server version 10.5 and later. By default, the tool is installed to the following path:
C:\Program Files\Winshuttle\SERVER\Manager\Tools\DataImporter\DataImporter.exe
Run DataImporter.exe to start the tool. The tool provides two distinct functions:
- Database Creation: This function enables you to create a new Winshuttle SERVER database. By default, a SQLite database file is available as part of a Winshuttle Manager Installation, so creating a new SQLite database file is unnecessary. However, if this file becomes corrupted or is deleted, you can create a new SQLite database file using this utility. In addition, you can create a new database in a required SQL server instance.
- Data Migration: This function enables you to move data from an old database to new one. The old database can be either a SQLite database file or a SQL server database.
Winshuttle Server supports SQL Server 2005/2008/2012.
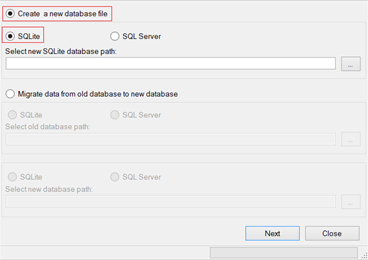
Creating a new SQLite database file
Back to top- Click Create a new database file.
- Click SQLite.
- In the Select new SQLite database path field, type or browse to the path where you want to place the SQLite database file, and then click Next.
- The utility will now create a new database file at the specified location. In addition, the tool creates any required tables and columns in the database file. After the process has completed, click OK.
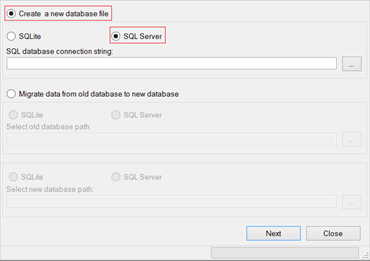
Creating a new SQL Server Database
Back to top- Click Create a new database file.
- Click SQL Server.
- In the SQL database connection string, type the complete connection string for your SQL server or SQL express instance. Alternately, you can click the browse button to browse to the connection string.
- In the Connect to SQL Server dialog box, select the Server instance from the drop menu. Type the database name and select the Authentication mechanism from the drop menu.
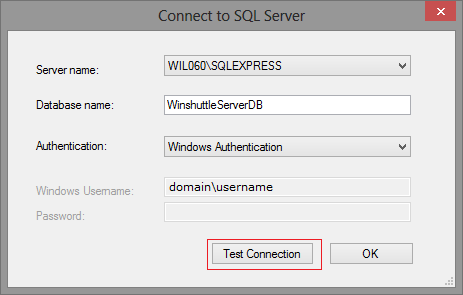
- Click Test Connection to test the SQL connection with the database using the selected authentication mechanism.
- Click Next.
- The utility will now create a new database file at the specified location. In addition, the tool creates any required tables and columns in the database file. After the process has completed, click OK.
Migrating data
Back to top- Click Migrate datafrom old database to new database.
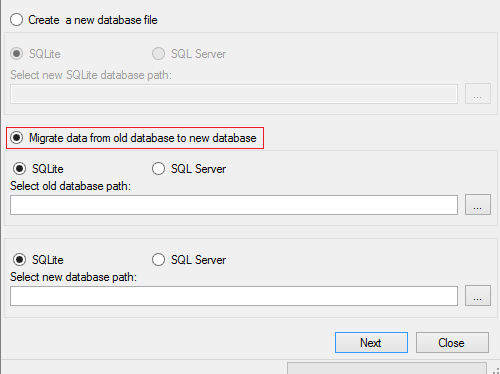
- Select the appropriate type (SQLite or SQL Server) for the old database.
- If the old database is a SQLite database, then type the path or browse to the old SQLite database in the Select old database path field.
SQLite
SQL Server
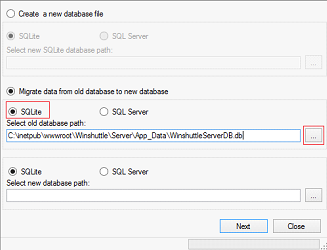

- If the old database is a SQL Server database, then type the path or browse to the complete connection string for the SQL server or SQL express instance.
- In the Connect to SQL Server dialog box, select the Server instance from the drop menu. Type the database name and select the Authentication mechanism from the drop menu.
- Click Test Connection to test the SQL connection with the database using the selected authentication mechanism.
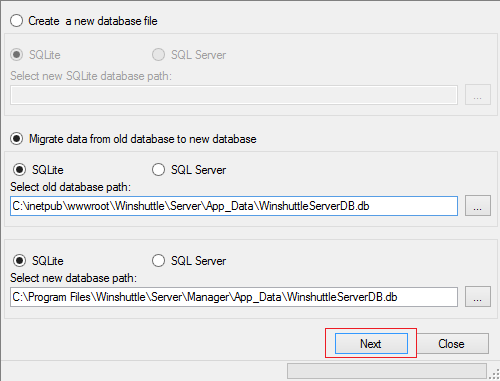
- Click Next.
- Select the type of database for the new database (SQLite or SQL Server).
- If the new database is a SQLite database, then type the path or browse to the old SQLite database in the Select old database path field.
- If the new database is a SQL Server database, then type the path or browse to the complete connection string for the SQL server or SQL express instance.
- Click Next.
- If there is any change in the Winshuttle SERVER URL in the new installation and you want your published service to direct to this new URL, select Move all published services to new Winshuttle SERVER URL.
- Type the new Winshuttle SERVER URL.
- If there is any change in the CENTRAL site, and you want to direct all published services to new CENTRAL site, select Migrate Winshuttle CENTRAL URL in published services.
- Type the old URL for the Central site in the Old URL column, and then type the new URL for the CENTRAL site in the New URL column. This will map the old URL to the new URL.
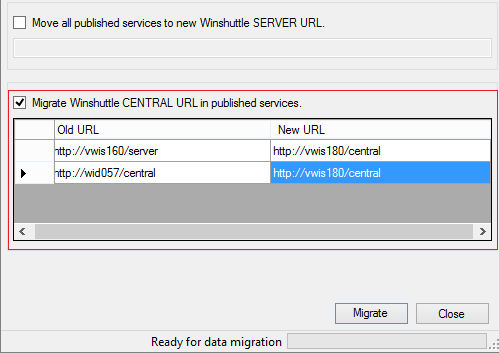
- Click Migrate to migrate all data from the old database to new database.
- Close the tool after migration is completed.