Applies to:
Winshuttle Foundation settings—Policies
![]()
Use the Policies page to:
- Define policies for users to control access for Query and Transaction operations, including date/time, upload size, and more.
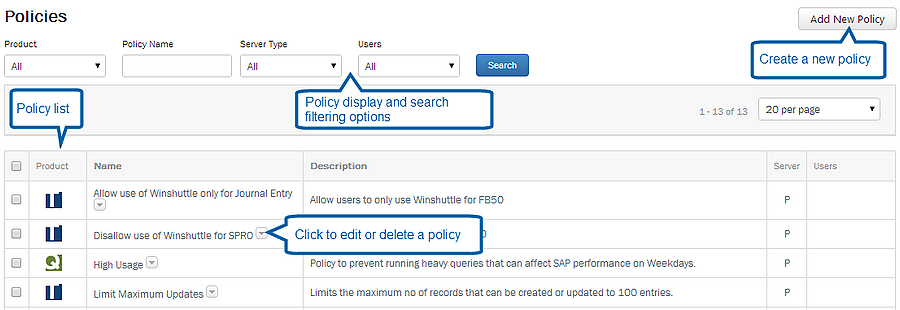
- View or search a list of existing policies
- Create, edit, or delete policies
- Add or remove users from policies
Note: Default roles (for example, the Central Application Administrator) displayed on the Policies page are not applicable to users in SharePoint groups. For users added through a SharePoint Group, you would need to add a separate policy and assign it specifically to the SharePoint group users.
On this page
Creating a policy
Back to top- Open the Winshuttle Foundation home page.
- On the menu bar, click Settings.

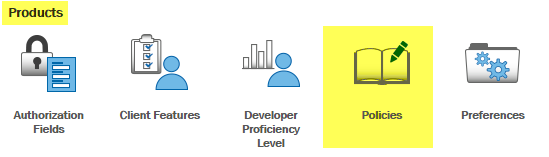
- Click Policies.

- On the Policies page, click Add New Policy, and then click Transaction Policy or Query Policy.

- On the policy page, specify the following settings to create your policy. See below for a basic description of available Policy settings.
- Under Policy Info, specify the following:
- Policy Name: Your name for the policy.
- Description: A description for your policy
- Server Type: Click the arrow, and then select a server type (Production/Non-Production).
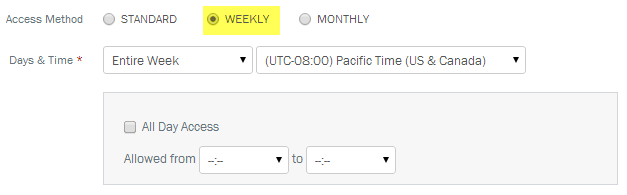
- Under SAP Server Access, specify the following:
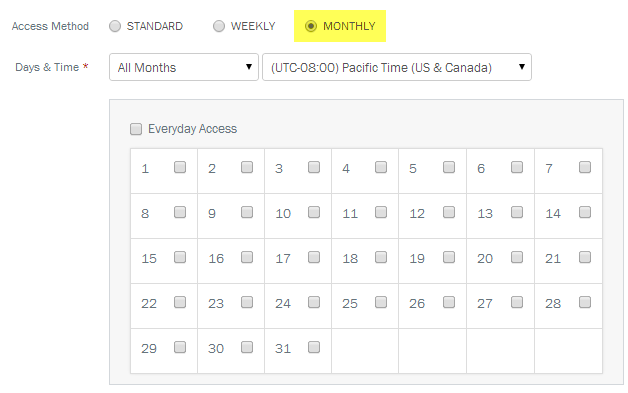
- Select Standard (daily), Weekly, or Monthly. Clicking Weekly or Monthly will enable you to enter specific times and/or days for access (see below).
SAP Server Access - Weekly access options
SAP Server Access - Monthly access options
- Under Transaction Access (applies to Transaction policies only), specify the following:
- Transactions per Run: The number of allowed transactions per run
- Allow SAP Transactions: The allowed SAP transactions for this policy. You can use wildcards (*) with this setting. For example you can specify FB01, MM* (for all MM transactions), VA01, etc.
- Disallow SAP Transactions: The disallowed SAP transactions for this policy. You can use wildcards (*) with this setting. For example you can specify FB01, MM* (for all MM transactions), VA01, etc.
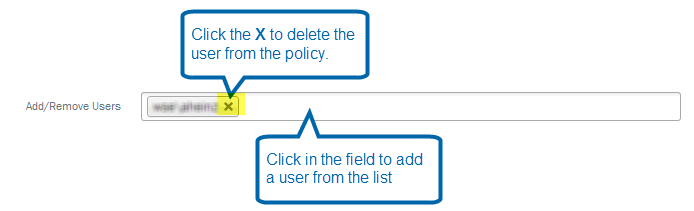
- Add/Delete users: Under Users, add (or delete) users from the policy:
- To add a user, click the field and then select a user from the list (repeat to add multiple users).
- To delete a user, click the X next to their name.
- Click Save to save the policy.
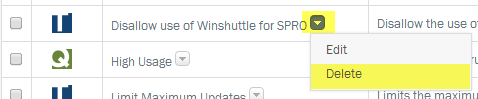
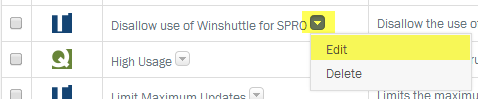
Editing a policy
Back to top- On the Policy page, click the arrow next to the policy name, and then click Edit.
- Change the policy settings as needed. See Creating a Policy for a basic description of available policy options.
Deleting a policy
Back to topOn the Policy page, click the arrow next to the policy name, and then click Delete.